
Page 6 - Kind News magazine, September/October 2021
P. 6
DIY VISIT
Fall Photo Frames KINDNEWS.ORG/FRAME
to see a demonstration
of this activity
online!
Fall is a wonderful time to take a walk outside in nature. As you walk,
see how many different animals you see, from birds to insects. Make a list of
what you see, write a poem, take photographs, or create a drawing. Collect twigs, leaves,
acorns, or other items of interest and bring them home. Press any flowers or leaves that
are not already dry by placing them between two paper towels and weigh them down with
heavy books until they are dry. Use your collected items to create and decorate a twig
photo frame and then frame your list, poem, photograph, or drawing and give it a title.
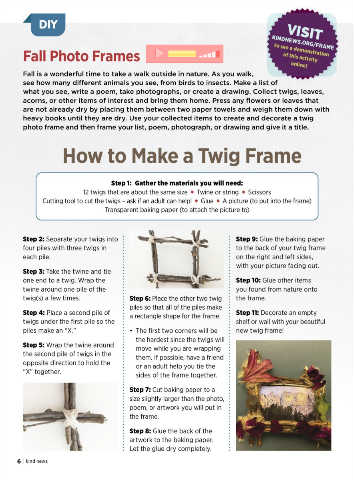
How to Make a Twig Frame
Step 1: Gather the materials you will need:
12 twigs that are about the same size • Twine or string • Scissors
Cutting tool to cut the twigs – ask if an adult can help! • Glue • A picture (to put into the frame)
Transparent baking paper (to attach the picture to)
Step 2: Separate your twigs into Step 9: Glue the baking paper
four piles with three twigs in to the back of your twig frame
each pile. on the right and left sides,
with your picture facing out.
Step 3: Take the twine and tie
one end to a twig. Wrap the Step 10: Glue other items
twine around one pile of the you found from nature onto
twig(s) a few times. Step 6: Place the other two twig the frame.
piles so that all of the piles make
Step 4: Place a second pile of a rectangle shape for the frame. Step 11: Decorate an empty
twigs under the first pile so the shelf or wall with your beautiful
piles make an “X.” • The first two corners will be new twig frame!
the hardest since the twigs will
Step 5: Wrap the twine around move while you are wrapping
the second pile of twigs in the them. If possible, have a friend
opposite direction to hold the or an adult help you tie the
“X” together.
sides of the frame together.
Step 7: Cut baking paper to a
size slightly larger than the photo,
poem, or artwork you will put in
the frame.
Step 8: Glue the back of the
artwork to the baking paper.
Let the glue dry completely.
6 | kind news